Category: reconstruction

  • New mesh reduction tools

    Holo Lab released this new Blender add-on that does a pretty job at reducing most photogrammetry models: https://github.com/HoloLabInc/ModerateWeightReductionTools

    It does fail on the more topologically challenged ones, but that is to be expected. As an example this 25MB model:
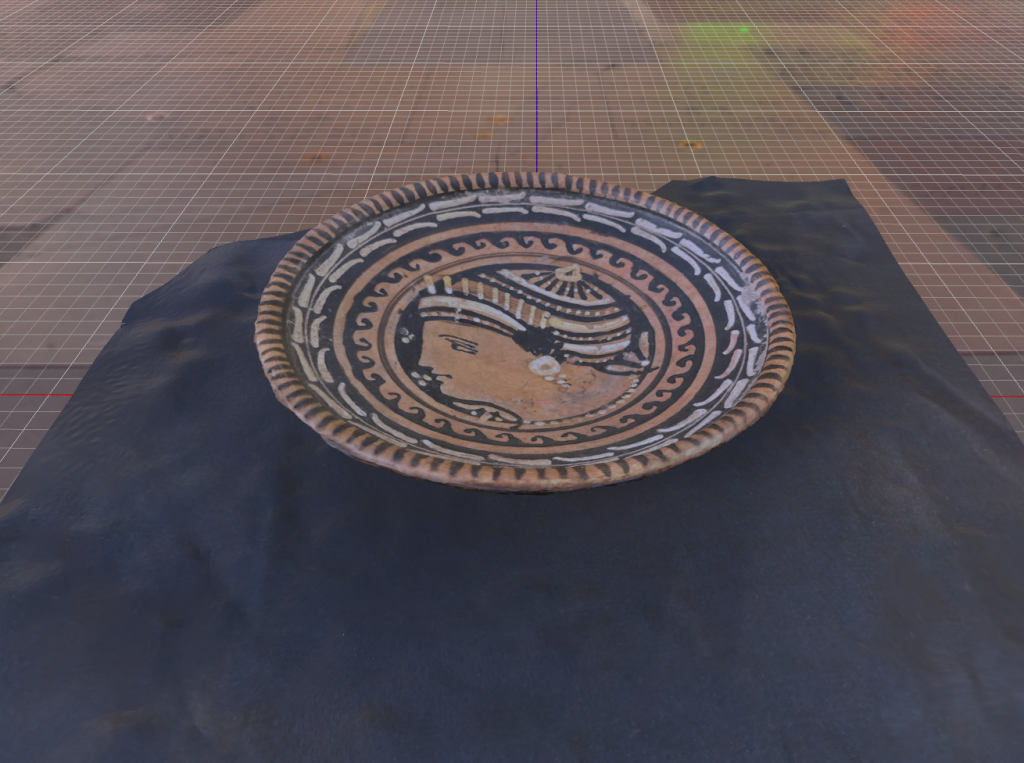
    Was reduced to this, which is just 295kB.
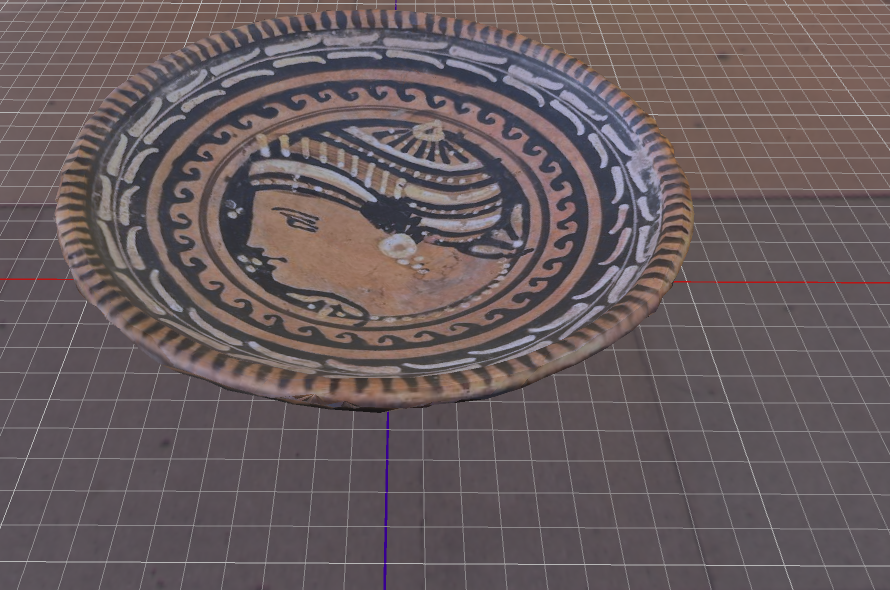
    I did remove the black background by hand, though.

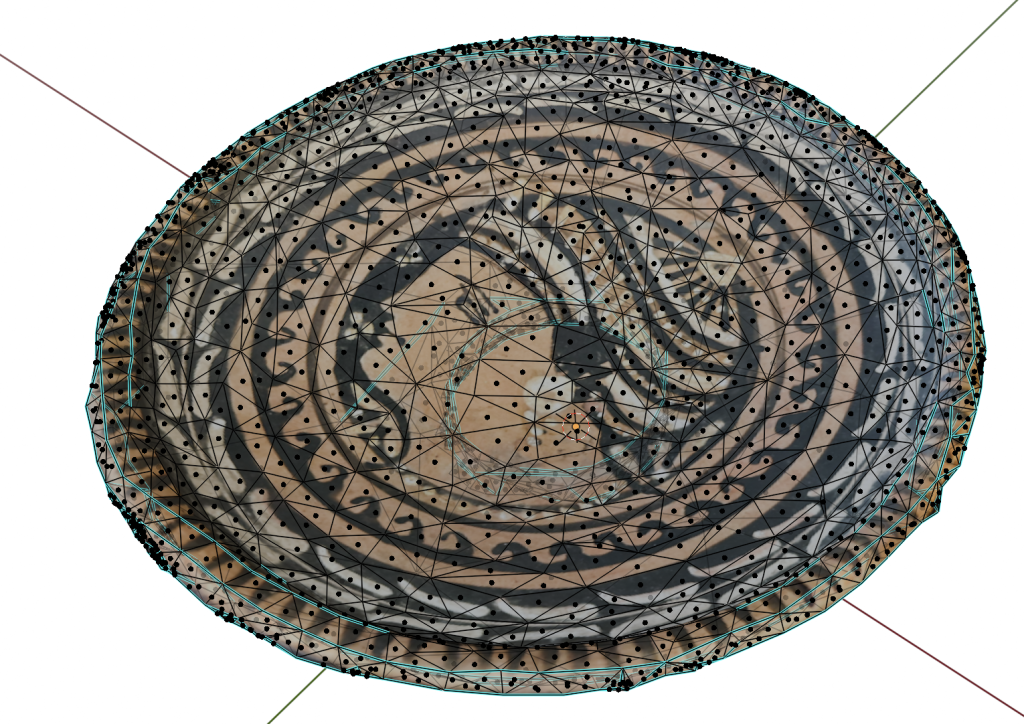
    The interesting thing is that it added Sharps to edges automatically, you can see them in cyan.
    Of course the other interesting announcements in this field were Nvidia’s Meshtron and Microsoft’s Trellis (try it on hugginface), both of which do really interesting mesh generation.

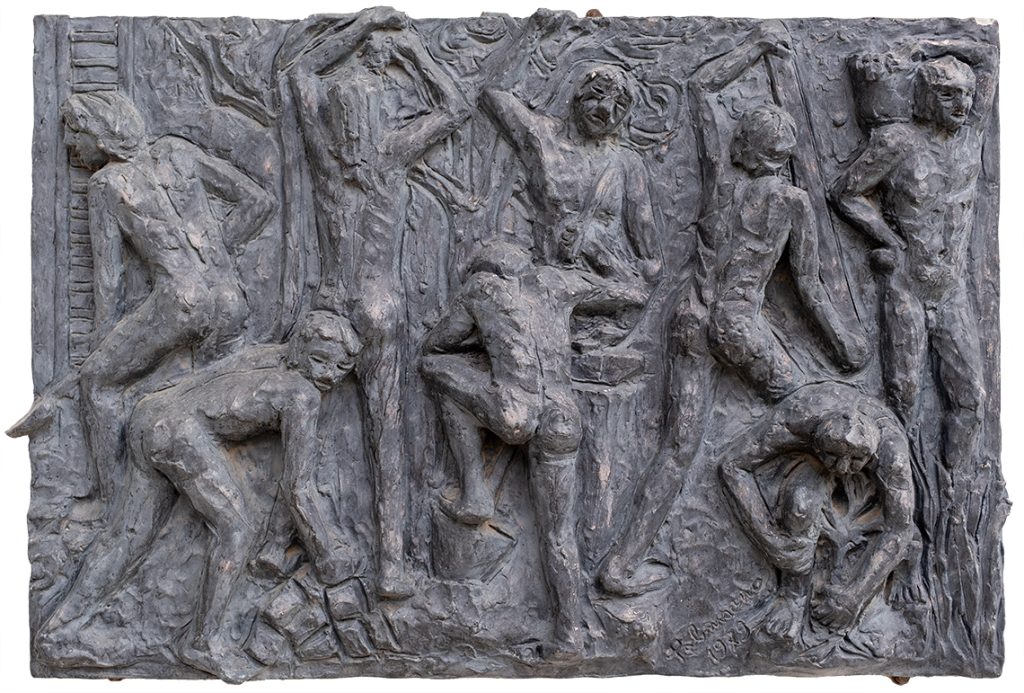
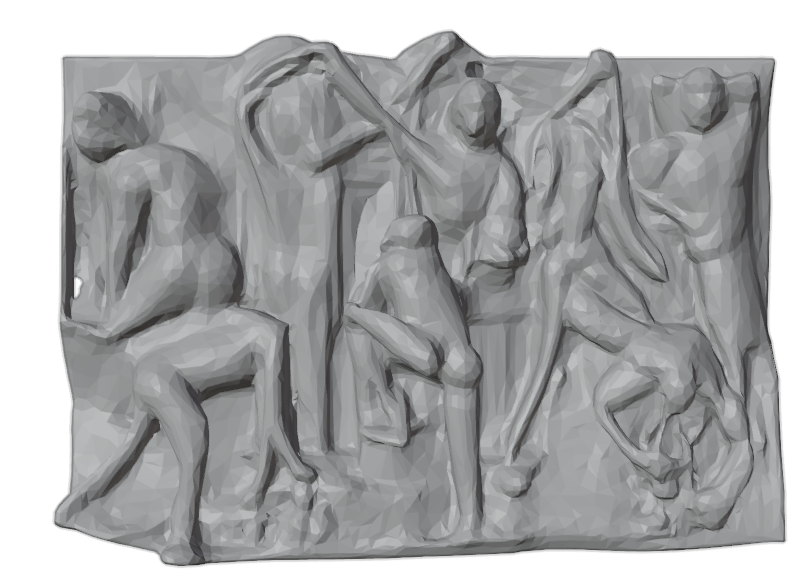
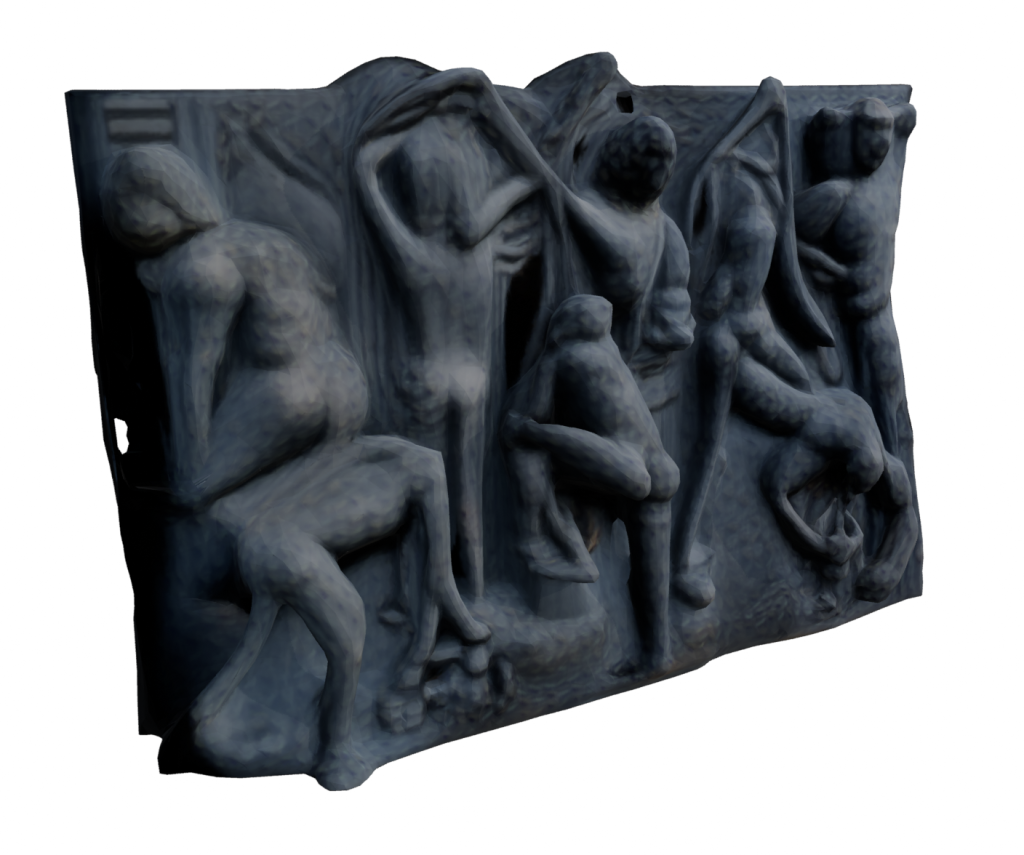
    Of course for our requirements we cannot simply throw generative AI at the problem and hope for the best, we need to carefully represent the actual objects. But just as a try, we did try to throw an image of a bas-relief at Trellis. It created a plausible (but incorrect) result with a low-res texture. We tried throwing the original image on it as a texture, and it almost looked like it worked, until we tried moving the point of view.

    This is the original photo, it’s Il Lavoro by Pietro Palmisano, from the BCC Arte & Cultura catalogue.
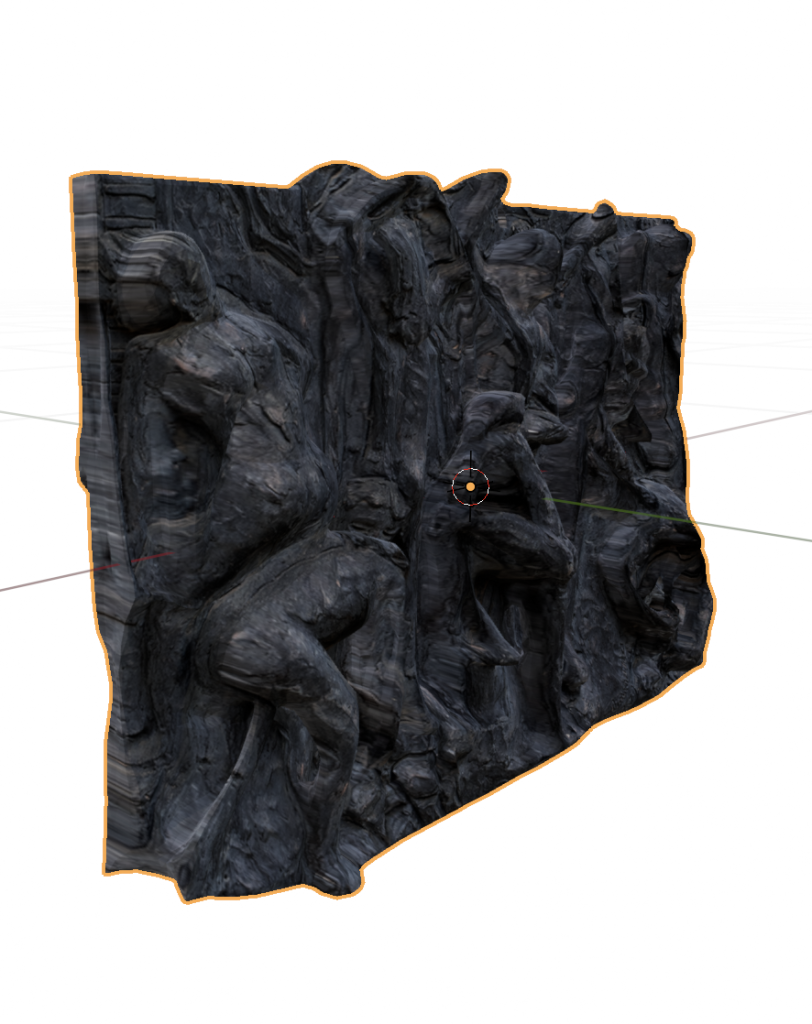
    Generated model, with no texture:
    With the AI-generated texture
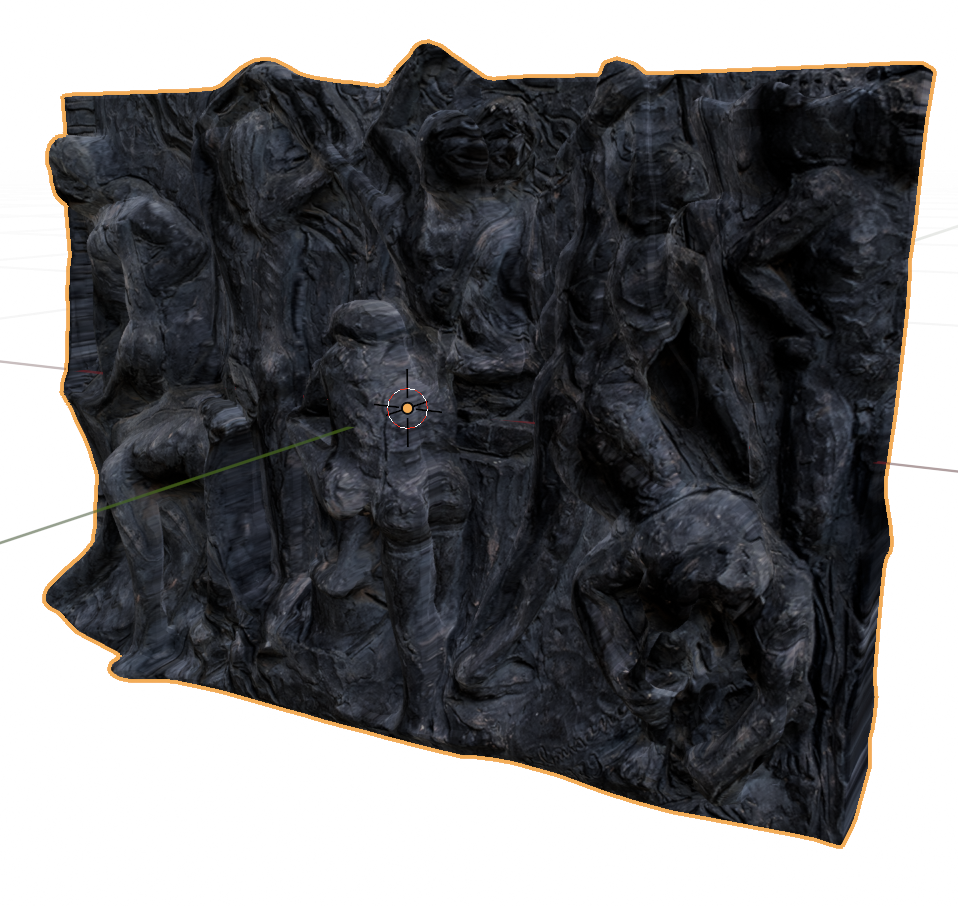
    With the original texture applied:
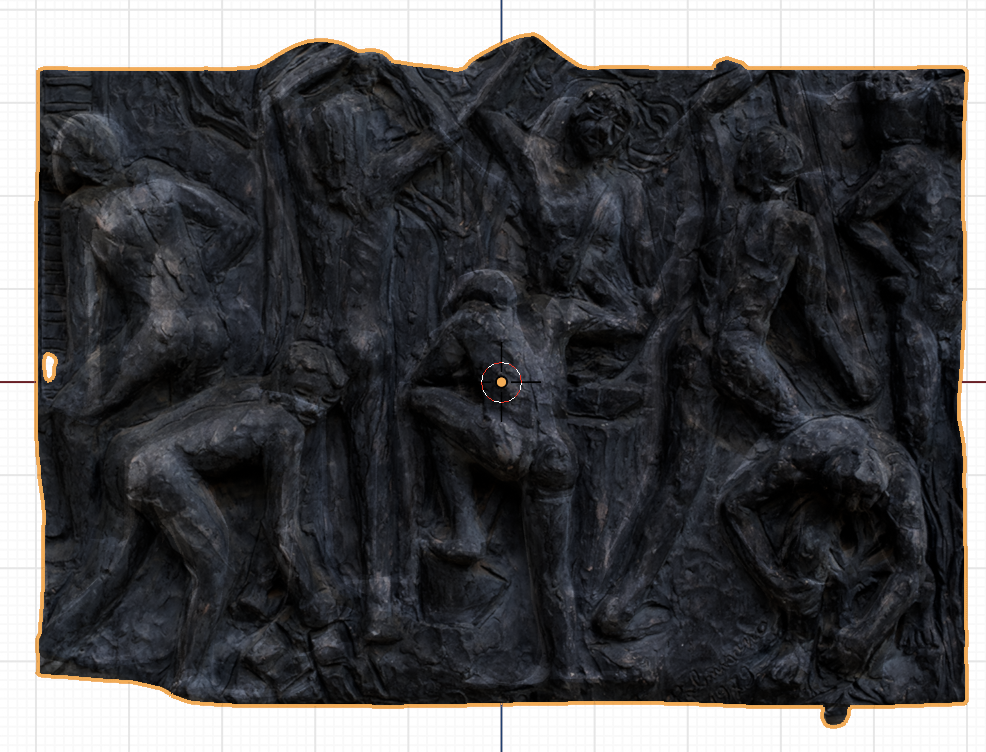
    It’s simultaneously very impressive, and not any good. We could try to salvage it by sculpting the most egregious parts, and we could do way better on the texture mapping.
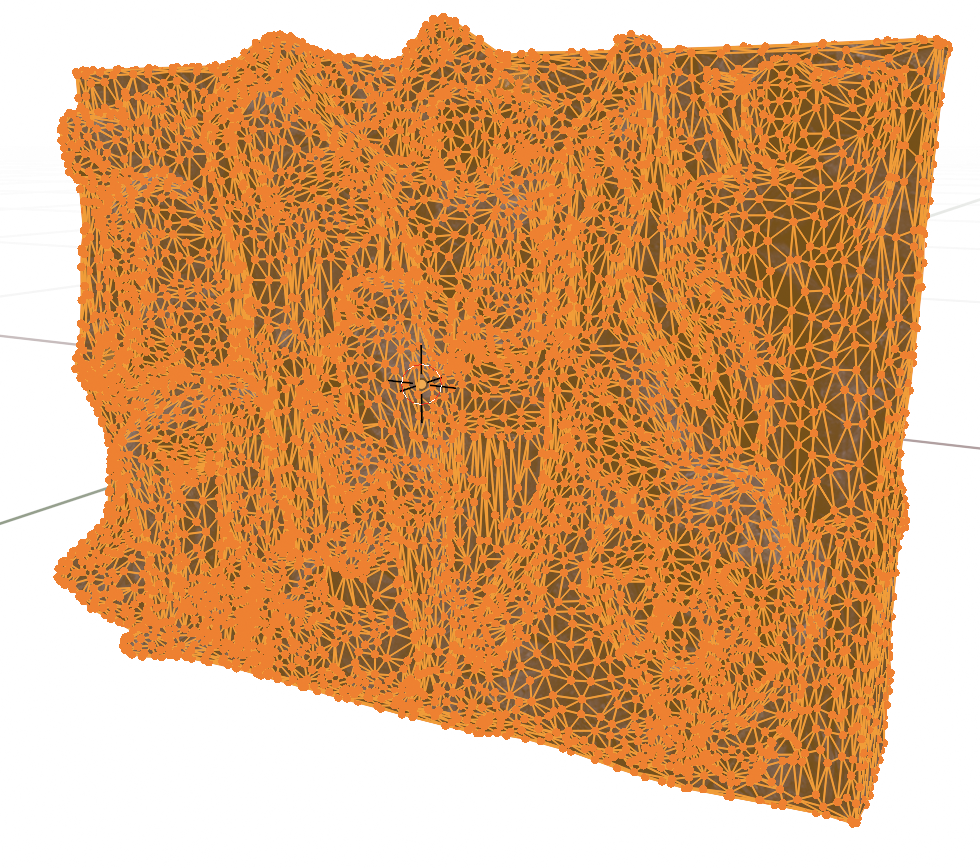
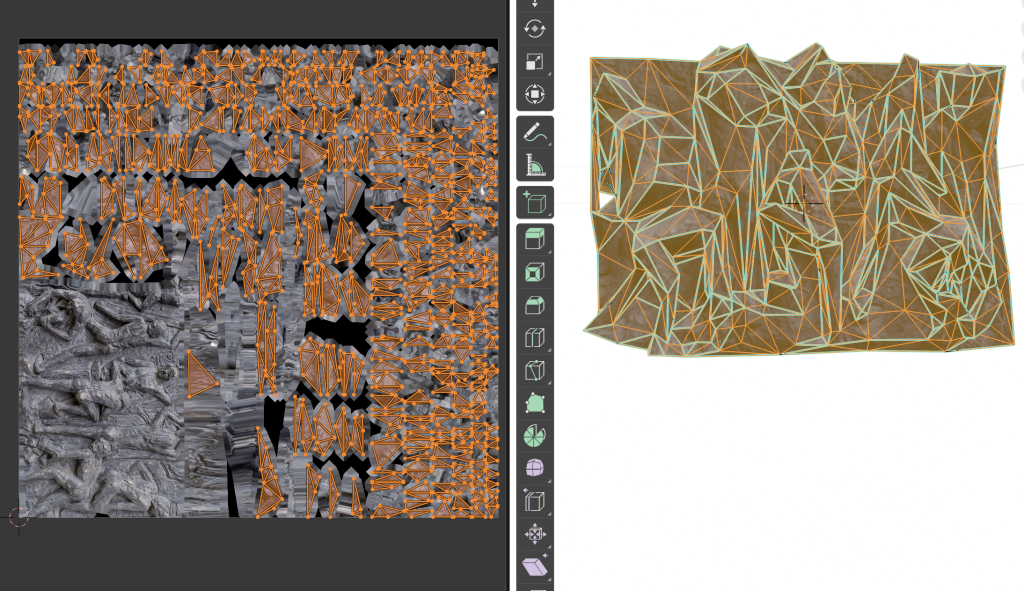
    The geometry is really quite dense, we could try combining Trellis with Moderate Weight Reduction Tools.
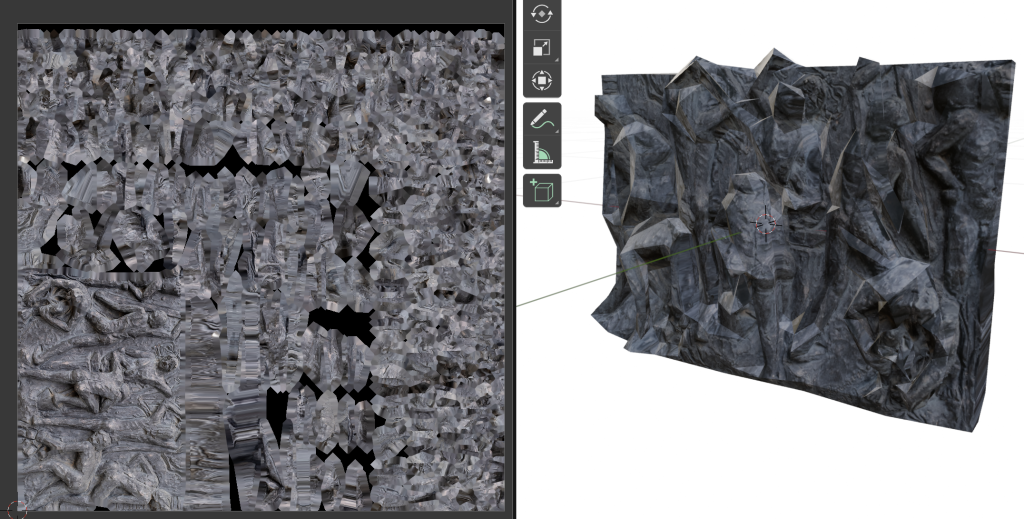
    That really broke down. The geometry became visibly spiky, but the texture is just all wrong, it did not expect our “Project from View” trick.
  • Go read: “Secret 3D Scans in the French Supreme Court”

    We’ve just read this post by the brilliant Cosmo Wenman of Concept Realizations.

    The cause is near and dear to us, doubly so because it involves Rodin’s The Thinker, which we have remixed for the BCC Innovation Festival.

    What we genuinely cannot understand is how people opposing the free distribution of our cultural heritage think of these issues. It is disconcerting, and we know that being unable to summarize the opposition’s views often signals a lack of genuine understanding.

  • Expedition report: BCC Arte & Cultura

    The first half of this year was taken up by two large projects for BCC ICCREA. We’re doing the immersive components of the BCC Innovation Festival (a startup festival, we were among the winners of the first edition) and of BCC Arte & Cultura (an effort to catalogue the art and cultural heritage artifacts belonging to the banks of the group). For the latter, we went around Italy digitizing the most complex and 3D objects.

    All the points we visited

    Logistics

    At this point it’s not really clear what we’re allowed to publish, as legal departments are surprisingly slow in responding to our queries, so we are going to err on the side of caution. You’ll have to wait until the official announcement before we post the actual works that we’ve digitised, but there shouldn’t be any harm in discussing how we set up the logistics.

    Sadly, these locations were largely connected too poorly to attempt to do the whole trip using public transport. We really wanted to be ecological, but we didn’t find a way to do it in the given time and cost constraints without heavily relying on cars.

    Once we could confirm the availability of the works on a given day we found cheap accommodations on Booking, loaded all the equipment and all the team members in a car, and we generally tried to avoid traveling during working hours. Northern Italy was covered through a series of short trips, while central and southern Italy were covered sequentially, going roughly clockwise. Some extra trips had to be broken out of the main loop, we managed to make that convenient by relying on some really good friends, who very graciously hosted us.

    The whole thing cost us a bit under €2000, which is not too shabby for a 3-person team. This figure includes highways, fuel, accommodation and food, but it does not include the wear and tear on my car. Or the fact that I forgot some lenses at a friend’s place.

    What we digitized

    Again, we’re not supposed to share images of the works, as many of them are copyright encumbered, so stay tuned for the official launch of the project. I don’t think there’s any arm in sharing a list of what we did, though:

    • Alla fine del Giorno, Alberto Sughi, oil on canvas
    • Natività, Ilario Fioravanti, painted ceramics
    • Presepe, Capuano Brothers, multiple materials
    • Ducal Palace and several artifacts, in Mafalda
    • Ut Unum Sint, Arnaldo Pomodoro, outdoor metal stele
    • Bank building, Ugo Pagliara, building and architectural drawing
    • Carrù Castle, building
    • Chandelier made of Murano glass, 3 paintings, near Venice
    • Acquaviva Picena, whole building (we ended up scanning the whole town)
    • Incontri al Maneggio, Silvano Spessot, iron and colored glass sculpture
    • Untitled, Nane Zavagno, steel sculpture
    • Pinocchio, Venturino Venturini, bronze sculpture
    • Sant’Antonio Abate, Luca della Robbia, painted ceramics
    • Bank builiding, part of the Gradara castle-town
    • Bank building in Alba (no drones for this one, we had to climb literal towers!)
    • Assalto all’Olimpo, Bruno Liberatore, bronze sculpture (a much larger version is in Rome)
    • Untitled, Cesare Berlingeri, bent and stacked colored paper
    • An archeological site in Rome, featuring Imperial-age fresco-ed walls and a very well preserved Roman road

  • An unflattering 3D reconstruction comparison

    An unflattering 3D reconstruction comparison

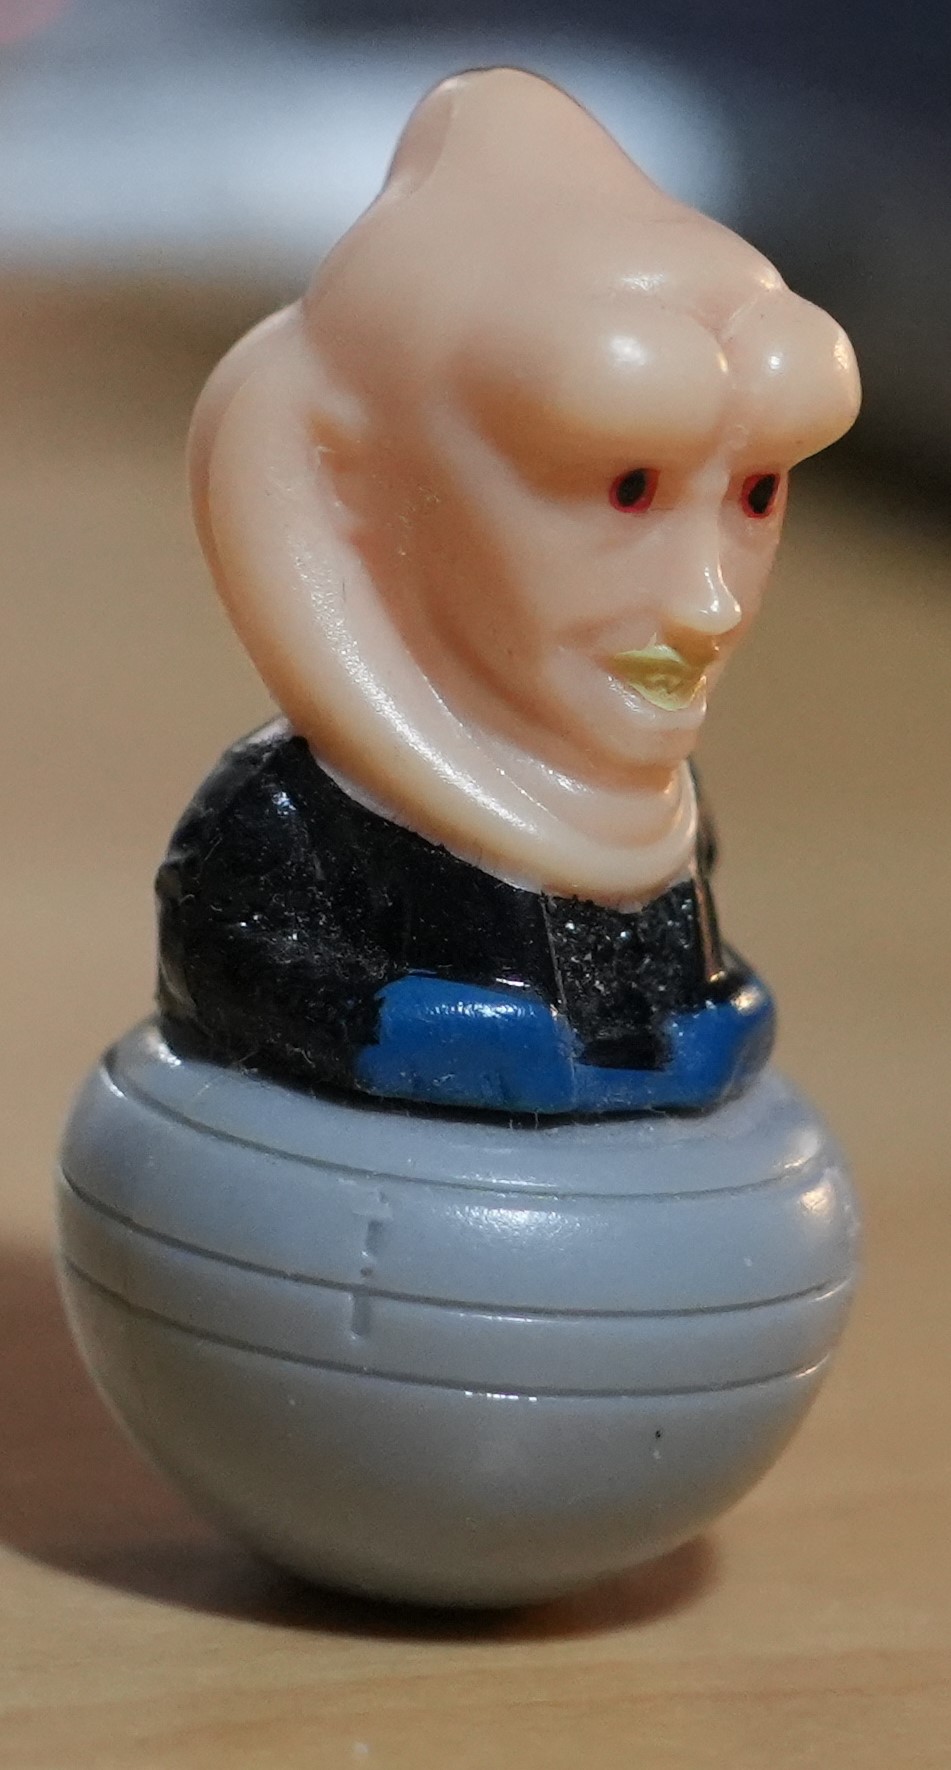
    We’re experimenting with macro tubes for photogrammetry, and we tried a comparison between two different cameras and two different reconstruction techniques. The subject was this rather hideous figurine of Bib Fortuna, Jabba the Hutt’s adviser, that a local supermarket gave out a few years ago.

    An ugly plastic figurine, depicting the bust and head of Bib Fortuna, with a ridged grey sphere instead of his legs.

    The difficulties stem from its diminutive size and from its texture. It is quite smooth, with lots of reflections and some subsurface effects. Also the lighting in the room was very direct, we had to move carefully to avoid throwing our shadows on the object, which negatively affected the spatial sampling.

    Our objective was clearly observing how these technologies fail, so it suited us.

    Macro Tube + Photogrammetry

    https://poly.cam/capture/82c44695-e858-4ed1-8132-dd6d44778175

    Macro Tube + Gaussian Splatting

    https://poly.cam/capture/82c44695-e858-4ed1-8132-dd6d44778175

    iPhone + Photogrammetry

    https://poly.cam/capture/0B379F23-0C60-4CD5-BB29-6D21E2A2B4E4

    iPhone + Gaussian Splatting

    https://poly.cam/capture/B3A580C6-09CE-43FD-8297-06E0F9539557

  • TIL-post: point cloud processing

    We’re working on a small archeo-acoustics project, whose starting point is a LiDAR-obtained point cloud in LAS format. This is the first time we’ve worked with this kind of data, so I’m writing down the data processing steps.

    There is a complete tutorial on handling point clouds in Blender by Florent Poux: https://youtu.be/DCkFhHNeSc0

    In order to visualize the data, my first attempt was using Blender, with this plugin: https://github.com/nittanygeek/LiDAR-Importer

    You only need to pay a bit of attention about the Python path while installing it, especially if you have multiple versions installed, but the provided instructions are perfect. We were able to see points in Blender, and to get a general idea for the shape of the cave, but getting from there to an actual mesh is non-trivial.

    Instead, we found a short tutorial for doing the same thing using CloudCompare.

    As a super short summary: open your point cloud in CloudCompare, select it, convert it to a mesh by going to Plugins>PoissonRecon. You can also choose between the color actually captured for each point, or this density heatmap: red is maximum information density, blue is the minimum.

    In the next steps we’ll need to convert the mesh to quads (using Blender), import the model into Ramsete, then assign materials to each face and run the simulation. In order to properly calibrate the model we’ll need to know the specifics of each material, or ideally even perform actual acoustics measurements, like we did for the Tindari paper.

  • A 3D reconstruction comparison

    A 3D reconstruction comparison

    In the past few weeks a new reconstruction technique has been taking the community by storm, called Gaussian Splatting. It is sort of an evolution on NeRFs, and mathematically it’s not dissimilar from the kind of reconstructions we do for spatial audio.

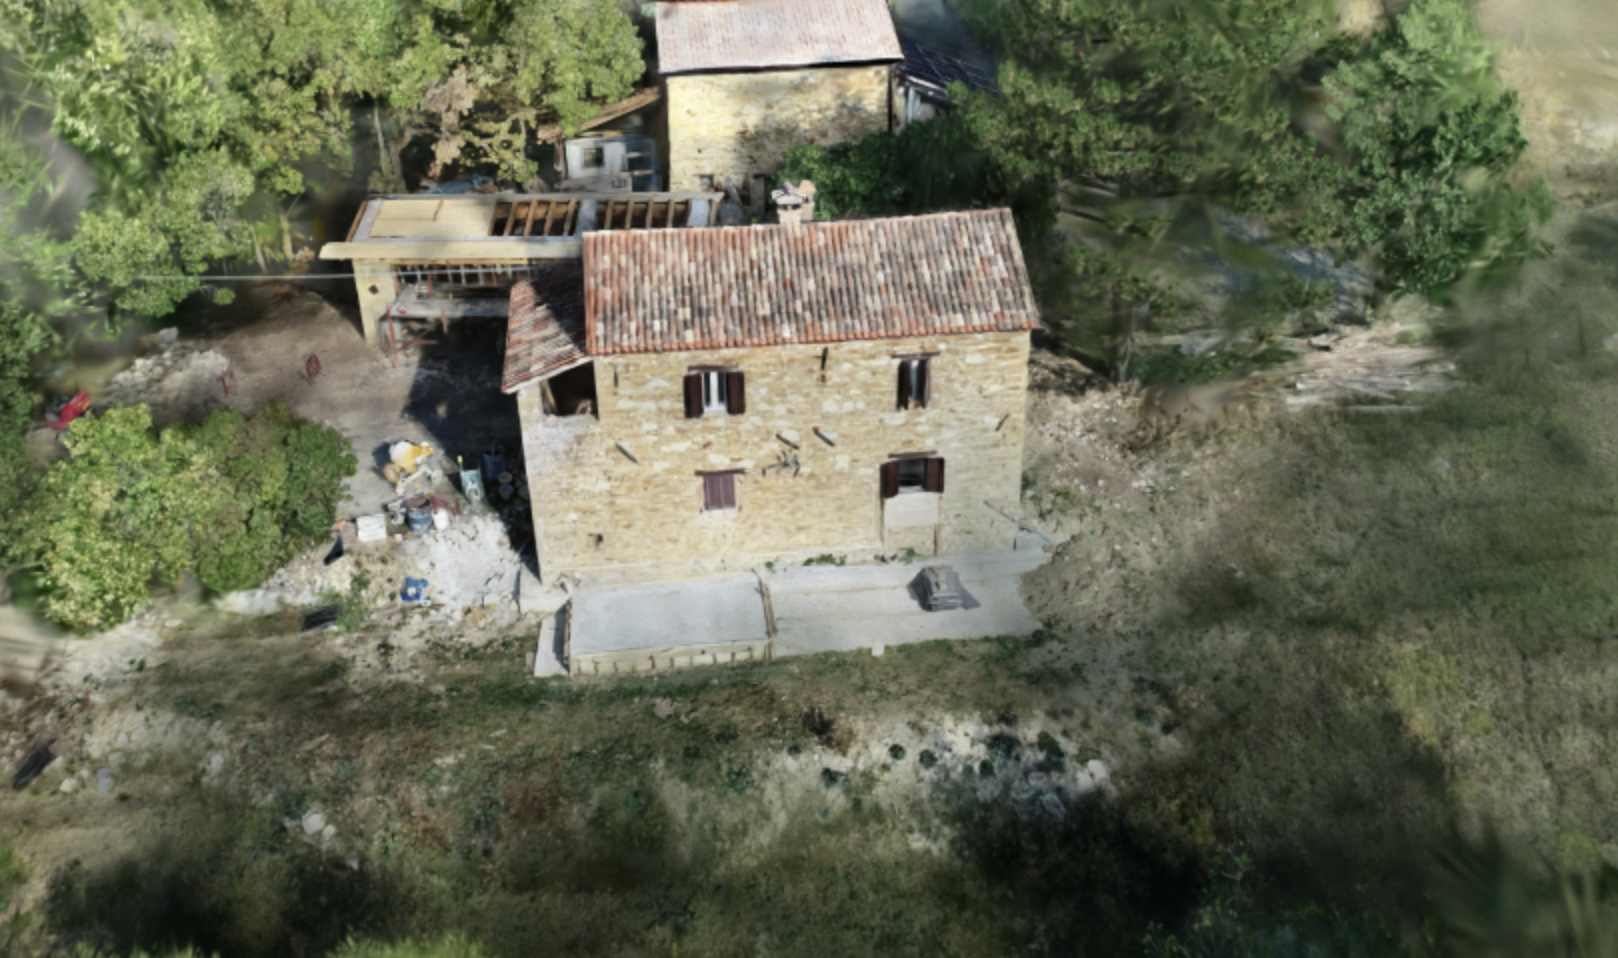
    Luckily a couple of companies have already implemented Gaussian Splatting pipelines, and here we are comparing two of them with photogrammetry.

    Here is Luma AI:

    Polycam

    And finally a photogrammetry computed with PhotoCatch (which uses Apple’s ObjectCapture API, like Polycam’s photogrammetry), converted to GLB in Blender to stay under Sketchfab’s size limit. In practice the only modification is that the textures are in JPEG instead of PNG.

    The difference is particularly evident in the textures on the building, and it’s just staggering on the vegetation.

    Also there is a small caveat: Luma was given a video, Polycam was given 200 photos, PotoCatch was given around 250 photos. This reflects differences in the platforms themselves.

    Update 2023-10-12: There is already an A-Frame component for self-hosting Gaussian Splats, we’re going to try it real soon.